
Creating Books
In addition to getting books with products, you can create your. Books are a great way to plan and organize your own adventures. They provide a single place that you can combine descriptive text along with all of the maps, encounters, monsters and more that you plan to use in an adventure. See Introduction to Books to understand what you can do with a book that you create.
Create a New Book

Click the NEW BOOK button in the library to create a new book.
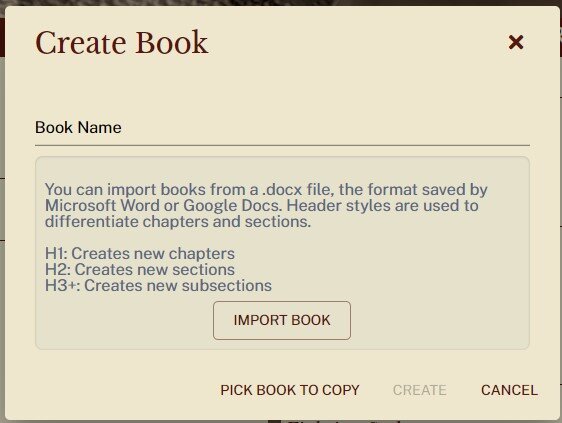
Type the name of the book and click CREATE.
More on import and copy later.
Edit Book
When you create a new book it will open in edit mode. If you click DONE EDITING it will return to read mode and show EDIT that will return you to the editing mode.

Headers: click headers to change text. Note: just plain text.
Rich Text: the rich text blocks below the hears can be edited and formatted with a variety of rich text. More about rich text editing.
ADD CHAPTER: adds a chapter before (top) or after (bottom) the current chapter.
+: adds a section/subsection. Note: you can promote or demote the section after adding it.
Menu (three horizontal lines): shows a list of options available on the chapter/section/subsection. See below.
Up arrow: moves the chapter/section/subsection and its children up one chapter/section/subsection.
Down arrow: moves the chapter/section/subsection and its children down one chapter/section/subsection.
Left arrow: promote a section to a chapter or a subsection to a section.
Right arrow: demote a chapter to a section or a section to a subsection.
Menu
Pick Content: show dialog to add/change content for the section. See more below.
Delete: remove the chapter/section/subsection and all children.
Convert: convert the section into a selected type.
Convert Children: convert each child section into a selected type. Note: only shown if there are children sections.
Insert Book: insert a book prior to this chapter. Note: only shown on the chapter menu.
Content References
When building a book there are many times that you want to include the full description of other fully modeled types, like a monster block, item, race description, or class description. All of these have their own types that already have this information and can be displayed in an appropriate fashion. Instead of duplicating this information in the book Shard allows you to reference these to display in the book. In addition to removing the formatting hassle this also means that the book always shows the latest version if you modify these types. Note: this is also how you show artwork in the book.
The Pick Content dialog allows you to add content references and control how they should show up.
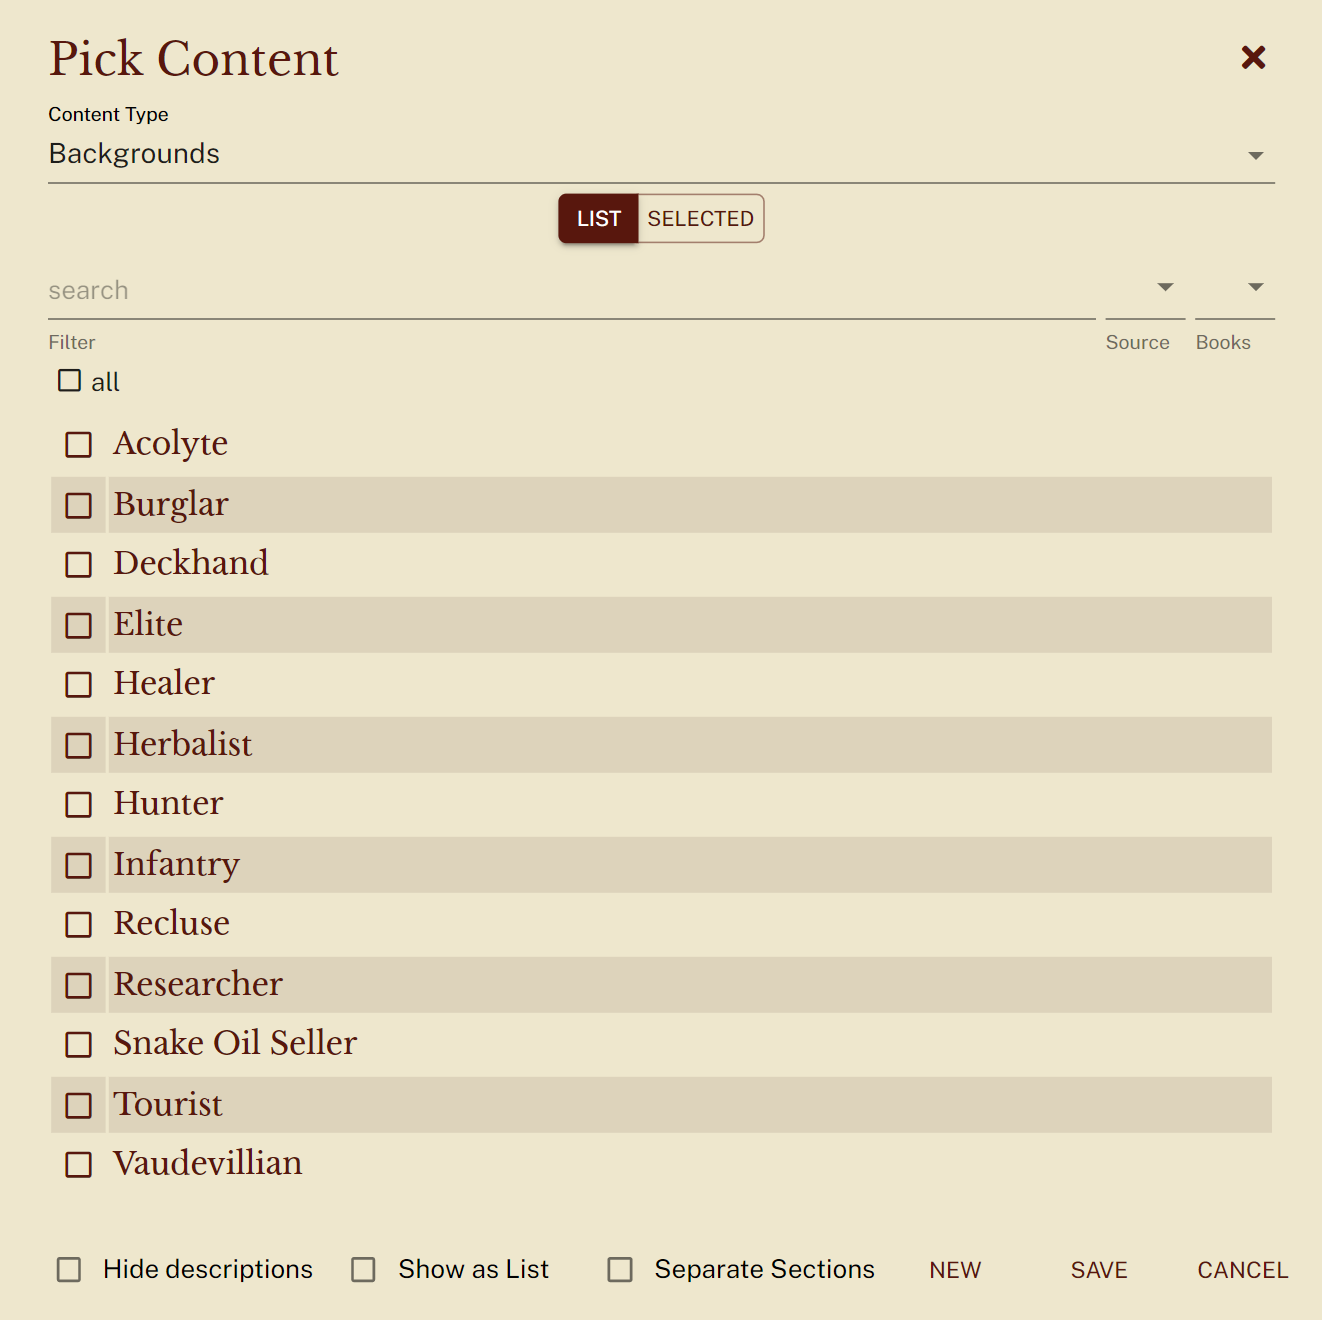
Pick content with a list

Pick Content with images
Content Type: allows you to select what type of content will be added to the book.
LIST: shows the full list of options to select.
SELECTED: shows only the entries selected.
Search/filters: provides text and value filters to help find the desired entries.
All: select or un-select all of the entries shown in the filtered results.
Hide descriptions: for types that have a description field the state of this field determines if those descriptions will be shown. This is useful in cases where there is a short description on the entry, but you want to have a richer description for the book.
Show as list: this will show a list of results in a summary table instead of showing the full details. Good for long lists where details may not be important, for example mundane equipment options.
Separate sections: add a section for each entry. See below for more information.
New: allows you to create a new version of the entry type. This is helpful when you want to do most of your initial authoring directly in the context of a book.
Save: update the selected entries in the book.
Cancel: throw away any changes.
Separate Sections
Separate sections is a special option that is only available when initially adding content, since it controls how the content gets added. There are two different styles of showing the content:
List: the list mode can show one or more entries of a single type. Each entry shows all of its data including showing a header for the type. Show as list is only available when using the list style for content.
Single: only a single entry can be shown and it is displayed without any headers. Display wise the section displays as the header of the entry. There are a couple of reasons to use this style. First, the header will display in the table of contents allowing users to easily navigate to the entry. Second, the rich text of the section will display in between the title and the entry contents making it look like a cohesive entry in the book.
When this “Separate Sections” option is used a subsection will be created for each entry with the header already set based on the entry, allowing you to create sections in bulk. Note: the headers will not update when an entry’s description changes.
More Information
To find out more about books check our our article on importing books and converting content.